
Performance Optimization
Living document about performance optimization in world-gen content.
The world generator is designed to give users absolute control so they can freely create the worlds they want. However, this also gives users the freedom to make extremely resource-intensive biomes. This means users must understand which features and approaches are more costly, and how to use them to get the best performance out of their world-gen content.
In this document, we present some high-level techniques for improving performance and highlight potential pitfalls. Please refer to the node reference for more detailed information about the nodes discussed here. We recommend that users try the different techniques in their content and use the performance report to measure improvements.
This is a living document that is meant to be updated and fleshed out over time.
Performance Report
World-gen prints a performance report to the logs at a few configurable sample-size intervals. Once a certain number of Chunks are generated, it averages the performance stats for all of them and prints a report.
It can help to focus your efforts on the parts that take the longest time in your performance report.
To view the report, you must open the world's logs:
- Right-click on your world in the world selection menu.
- Open the world's folder.
- Navigate to
logsand open the latest log.
Metrics Breakdown
In the report, you'll see a lot of information. Below are the parts you have the most control over by optimizing world-gen assets.
Sample Count: 500The number of Chunks generated and averaged in this report. We recommend using reports with a Sample Count of at least 500 for better accuracy.
Total: # msThe total time it takes world-gen to generate and transfer the contents of a Chunk to the world.
Content Generation: # msThe time it took to only generate the contents, excluding the time it takes to transfer the generated data to the game world. This is the value you have most control over by optimizing world-gen assets.
Static Bounds Initialization: # ms
Dynamic Bounds Initialization: # ms
The Static and Dynamic Stage context bounds initialization.
- The
Static Bounds Initializationisn't affected much by the assets. - The
Dynamic Bounds Initializationis affected by the overhead of theChunkandPropContext Precision options in the Runtime node.
ExampleStage (Stage #): # msThe time it takes each Stage to complete. Stages run sequentially, one after the other. This metric is affected by two factors that compound each other:
- The Stage's output size.
- The larger the
Average Actual Output Size, the more expensive this will be. - The output size metric is listed in the Context Dependency part of the report.
- The output size is determined by all the Stages with a number greater than this one. For example, Stage 2's output size is determined by Stages 3, 4, 5, 6, etc.
- The larger the
- The cost of the content itself. In other words, how expensive is the content it is trying to generate? Optimizing its assets will decrease this metric. Here's what content assets affect each Stage's performance:
- BiomeStage
- The World Structure's Biome map Density. This is generated in 2D so it's relatively cheap, but it can become significant with larger output sizes.
- BiomeDistanceStage
- The World Structure's DefaultTransitionDistance and MaxBiomeEdgeDistance values.
- TerrainStage
- The WorldStructure's DefaultTransitionDistance and MaxBiomeEdgeDistance values because in the transition area between Biomes the terrain is computed twice: once for each Biome.
- Each Biome's terrain Density.
- Each Biome's Material Provider.
- PropStage #
- The Prop Runtimes with index # inside each Biome.
- TintStage
- Each Biome's Tint Provider.
- EnvironmentStage
- Each Biome's Environment Provider.
- BiomeStage
ExampleStage (Stage 2):
	Maximum Possible Output Size (Buffer Column): {x=14, z=14}
	Maximum Possible Output Size (Chunk Column): {x=3.5, z=3.5}
	Average Actual Output Size (Buffer Column): {x=11.77, z=11.77}
	Average Actual Output Size (Chunk Column): {x=2.94, z=2.94}
	Total Buffers Generated: 18171
The Output Size metric tells us how large an area each Stage must generate per Chunk.
Maximum Possible Output Sizetells us how large it can get.Average Actual Output Sizetells us the real output size of this Stage over the sampled Chunks.Total Buffers Generatedtells us exactly how many buffers this Stage generated over the sampled Chunks.
In this example, the ExampleStage can output a maximum area size of 3.5 by 3.5 Chunks, but in reality across the sampled Chunks it outputs an average area of 2.94 by 2.94 Chunks.
Decreasing the Average Actual Output Size will improve a Stage's performance metric. To reduce the Output Size of a Stage, you must reduce the required context size of the Stages following it.
- Right now the main contributor to the Output Size metric is the total size of Props in the Prop Stages. See Props.
- Other contributing factors for BiomeStage are the
DefaultTransitionDistanceandMaxBiomeEdgeDistancevalues of the World Structure.
Important tips when interpreting the report:
- Use reports that have a
Sample Countof at least 500 for accuracy. - The contents of the explored location in the world can impact the stats. For example if you happen to only explore an area containing cheap Biomes the values could look better than they are for the entire world. To mitigate this:
- Explore more areas of your world.
- Use the same seed and location across different asset changes to measure improvements.
- The computer's CPU and RAM specs and thermals impact these metrics directly. They must be accounted for when comparing reports.
- The first Chunk after teleportation or world creation will take longer than average because it must initialize the context from zero. Following Chunks will see faster performance.
Terrain
Focus Expensive Density by Leveraging Mix
Density is calculated for every block in the world. You can reduce the cost of the expensive parts of your Density configuration by limiting it to the specific regions that require it. You can combine doing this vertically and horizontally to isolate an expensive field to the smallest region possible.
Some example applications:
- Above your terrain's maximum height. This area is entirely empty and doesn't need to calculate your terrain's Density.
- Omit generating your surface Density field underground.
- Expensive terrain features that are local to an area can be masked out. Identify them, mask them with a cheap Density field, and use that mask to Mix in a cheaper field outside their active areas.
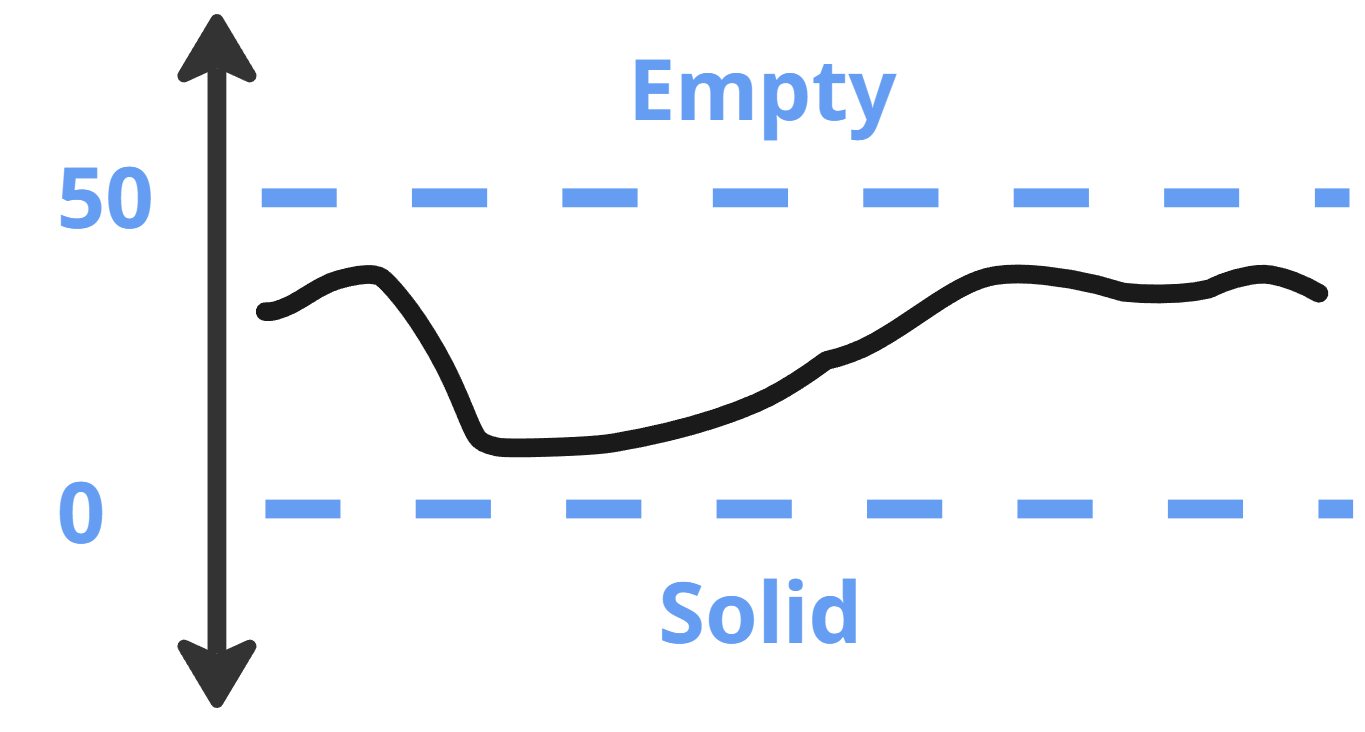
To cover the first two cases, use Mix at the root of your Biomes to replace the area above the highest point of your terrain with a Constant Density of -1. Do the same underground, but with a Constant Density of 1.
Prefer Mix over Sum, Min, or Max whenever you want to transition between different Density effects inside a Biome. Mix disables the fields where they don't need to be calculated, while the other approaches don't.
Reduce Density Samples
Calculating density fields for every coordinate can be wasteful when it's not required. We recommend using YSampled to reduce the number of vertical calculations.
This works well for more expensive Density fields where a higher sample resolution isn't visually apparent. However, for more detailed fields, the sampling distance may need to be reduced.
As a simple first approach, put YSampled at the root of your Biome's Density. If that doesn't work well with your setup, for example if you get undesired artifacts, add YSampled more precisely to individual parts of your Density instead.
You can also use a hybrid approach where you mix between the sampled and non-sampled versions of a field in different areas, based on how much detail you need, by using a Mix. Some example applications:
- If you need higher precision around the water level, you could use the non-sampled field around shores and the sampled field everywhere else.
- If you need a field to be precise around a POI, but it can be less precise farther away, this could be achieved with a PositionsCellNoise to control the Mix.
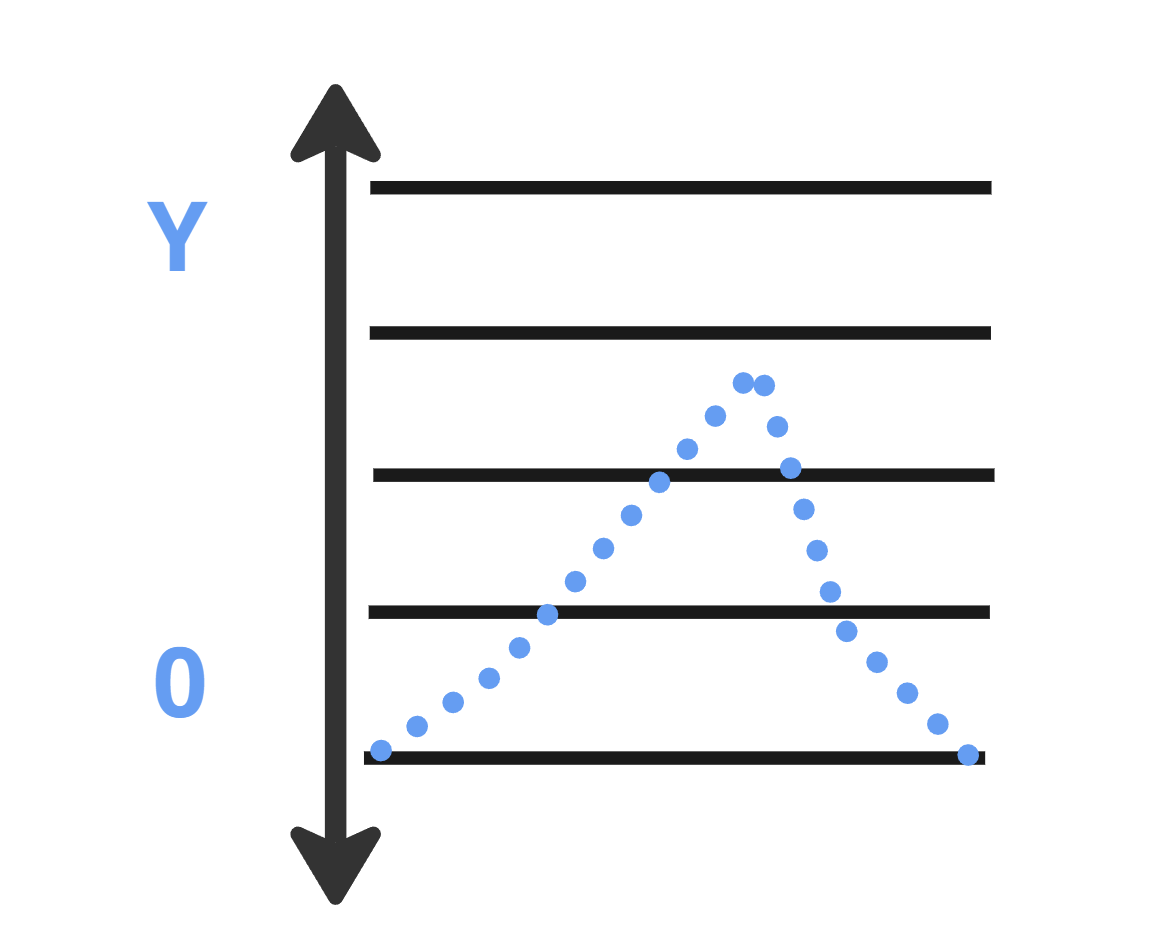
We recommend a SampleDistance of 8 for the biggest performance improvement, and a SampleDistance of 2 in areas that require higher levels of detail. Feel free to experiment and measure different values to find what works best for your content.
Caching
The Cache Density remembers a limited number of recent coordinates and their Density values. This node reduces calculations in situations where the same coordinate is requested consecutively.
Where to use:
- This is already automatically included in the SimplexNoise2d and CellNoise2d nodes, no need to add it there.
- On the right side of YOverride nodes.
- As the Density child of the CellValue ReturnType. Depending on the PositionsCellNoise setup, it could benefit from larger Cache capacities.
- At the root of ChoiceDensity in the Density ReturnType. Depending on the PositionsCellNoise setup, it could benefit from larger Cache capacities.
3D domain warping Density nodes tend to invalidate the 2D caches of all their children, which can have a significant impact on performance. Use 2D warping instead of 3D where possible.
Materials
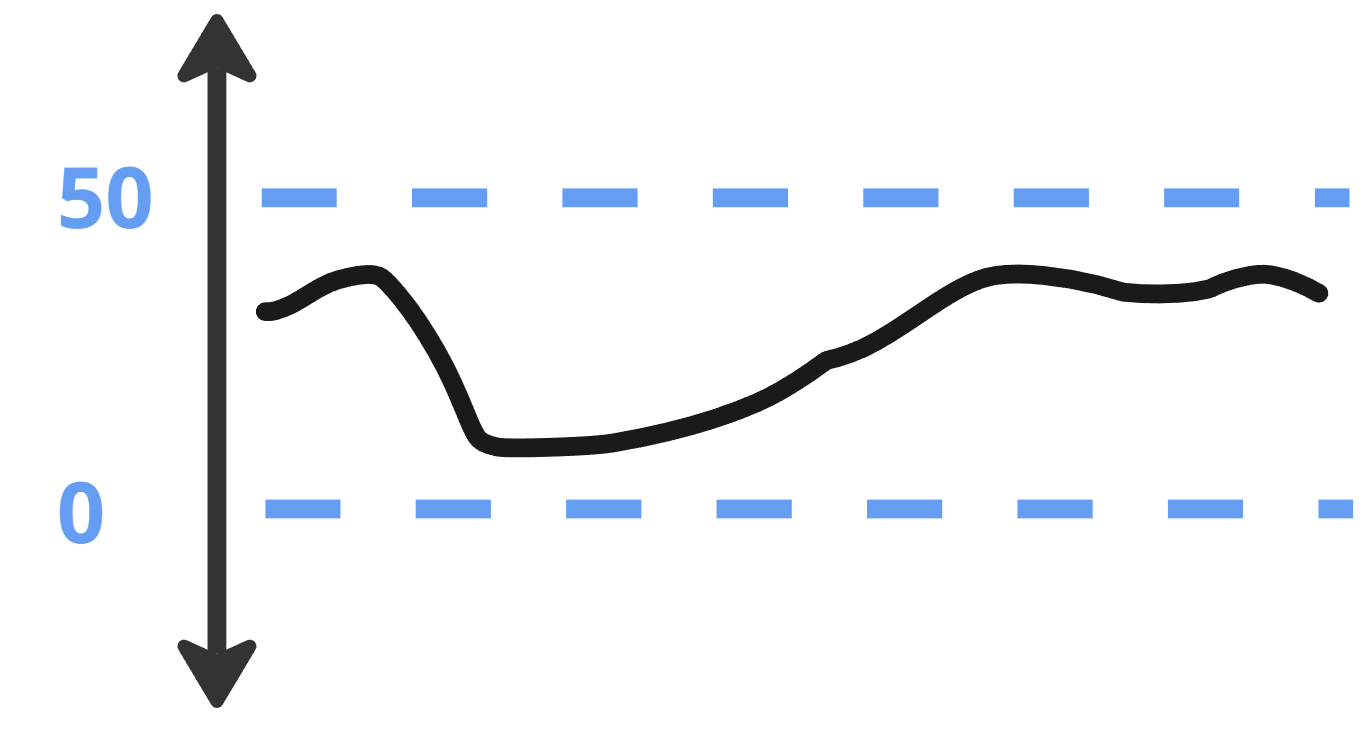
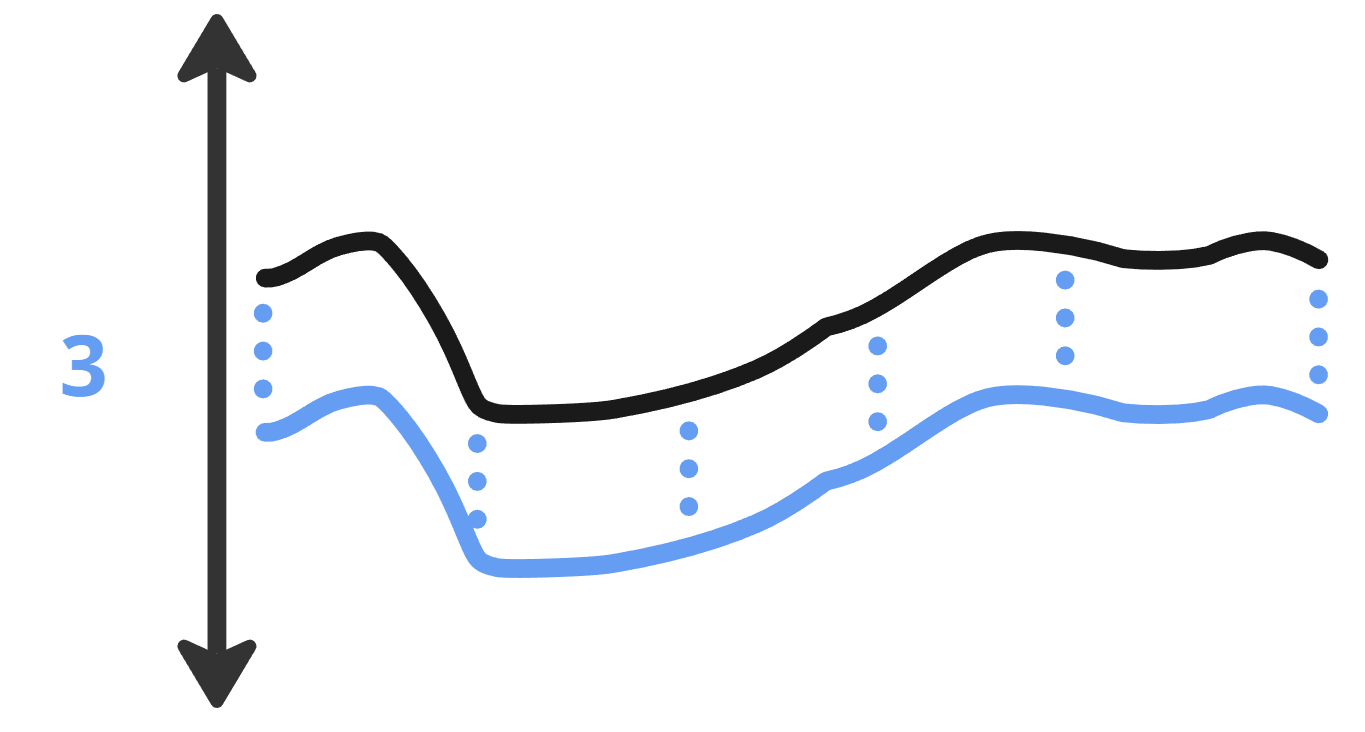
Like Density fields, Material operations are run for every coordinate in the world. This is particularly expensive when using Density in your Material Provider nodes. To reduce the performance impact of those Material Providers, we can limit the region they're applied to. Do this by putting expensive nodes as far to the right as possible in the node tree, and adding nodes as far on the left side of the node tree that limit the area.
Simple Horizontal Material Provider
Reduces the height range for its children.
Space and Depth Material Provider
Reduces the depth range for its children.
Other approaches:
- You can also use the FieldFunction Material Provider with a cheap Density mask to limit an expensive Material Provider's effect to a specific area of the world.
- Use the Terrain Density node when you want to reference the terrain's Density field for calculating a Gradient within your Material Providers. The Terrain Density node reuses the existing terrain Density buffers, which makes it much cheaper than importing the root of your terrain's Density. It also outputs the interpolated fields between Biomes, which imported nodes don't.
A Density gradient can be very expensive, because it resolves the child Density four times for every position.
- Make sure that you really need the gradient, and that you can't achieve similar results without it.
- Reduce the amount you're using by masking out as much of it as possible.
Props
The performance impact of Props is affected by the following factors:
- The cost of generating their content.
- The cost of running their Scanners and/or Patterns.
- The increase of the Output Size of prior stages if the Props need to scan their content.
Some Tips to Improve Performance of Props
- Follow the optimal Runtime setup for your Prop Distributions.
- Use the correct ContextPrecision setting for each Runtime.
To start optimizing the Context Precision options for your asset, set all the Runtimes to Biome. Then test each Runtime with a different value to see whether it improves or hurts performance.
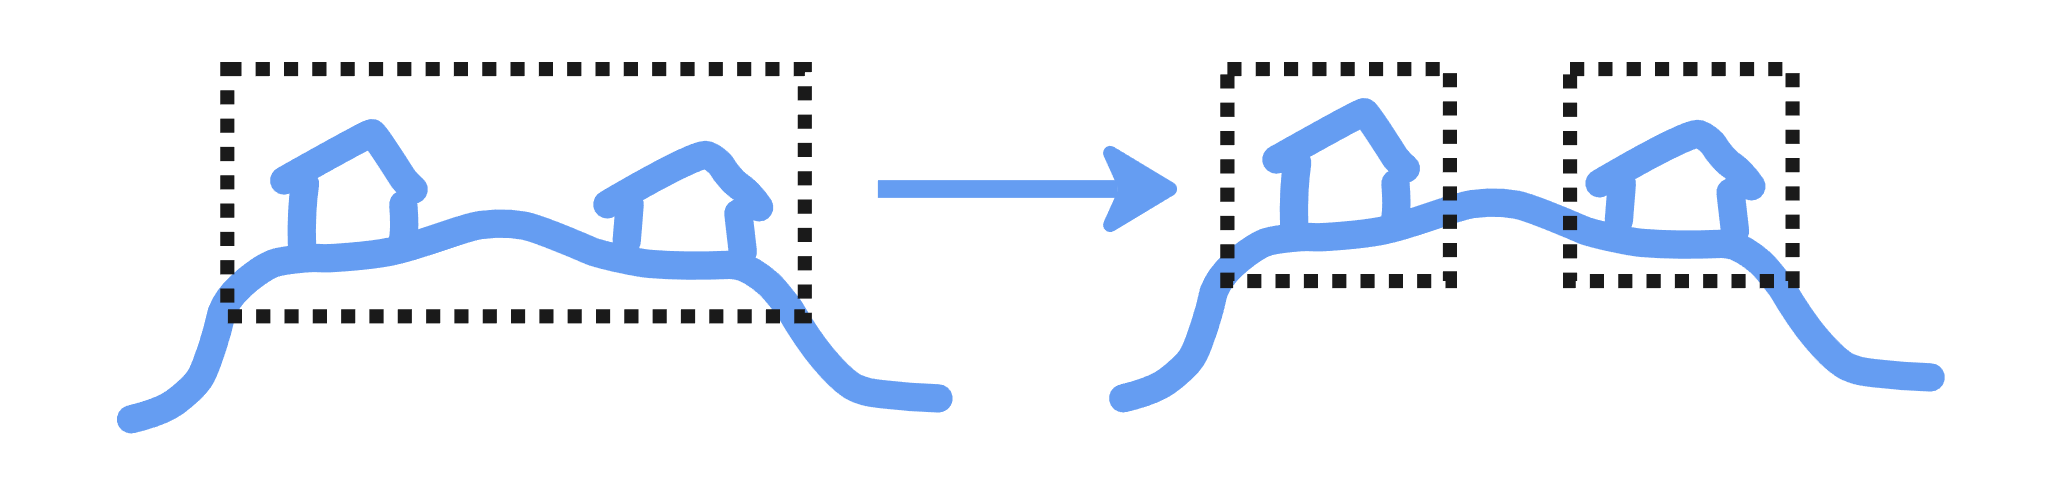
- Keep the horizontal size of each Runtime as small as possible to reduce the Output Size of prior Stages. A Runtime's size is equivalent to the largest Prop assigned to that Runtime index.
- Props with large horizontal patterns should be on the lowest Runtime possible. Each Runtime affects all the Runtimes below, so moving large Props lower reduces how many Stages they impact.
- Try to put as many of a Biome's Props into a Runtime as possible. Runtimes should only be used when Props require context from other Props, not to sort Prop placement priority. Prop placement priority is determined by the order within each Runtime.
- Make sure that all the Biomes in a World Structure are using the same Runtime indices, otherwise the world will end up with many more Runtimes than necessary.
- Where possible, reduce Props' horizontal size by breaking large Props up into smaller modular pieces that are assembled at the Prop Distribution level.
- Reduce the need for large complex Pattern and Scanner setups by preparing the terrain in proximity to an important Prop.
Useful Optimization Steps
A checklist of steps to help you optimize your world-gen assets, roughly ordered from easier to more complex. Each step links to the section that explains it.
- Use 2D Density where possible, and 3D Density only when necessary. This includes preferring 2D domain warping over 3D. See Caching.
- Put Cache nodes on the right side of all YOverride nodes. See Caching.
- In your WorldStructure asset, make sure you're not using
DefaultTransitionDistanceandMaxBiomeEdgeDistancevalues that are greater than necessary. - Replace the Density above your terrain's maximum height and underground with Constant values, using Mix. See Focus Expensive Density by Leveraging Mix.
- Prefer Mix over Sum, Min, or Max when transitioning between Density effects inside a Biome. See Focus Expensive Density by Leveraging Mix.
- Mask expensive terrain features with a cheap Density field, and Mix in a cheaper field outside their active areas. See Focus Expensive Density by Leveraging Mix.
- Use YSampled to reduce the number of vertical Density calculations. See Reduce Density Samples.
- Limit expensive Material Providers to the smallest region possible. See Materials.
- Reduce the Density gradient work inside your Material Providers. See Materials.
- Optimize your Props' context size and performance. See Some Tips to Improve Performance of Props.